Anatomy of Confidence
By Nicholas Rougeux, posted on March 27, 2005 in Art, Fractals
I'm not trying to toot my own horn here but I'm often asked how I'm able to create fractals the way I do. There is never an easy explanation—especially since the answer can often get technical very quickly and few people even know what a fractal is let alone the program that I use to make them. This is an attempt at trying to explain how I created my Confidence fractal.
I'll be giving some specifics as to which formulas I used, layer properties, and some information on how to get to the locations for each layer but details such as exact locations and all the parameter settings won't be revealed. Why? Think about how a painter paints. That painter could document every step and show the world and others could simply watch or learn techniques but never be able to reproduce the original flawlessly thereby preserving it and security it's authenticity. With fractals, I could explain all my methods and show how to set every parameter but with that information out there, anyone could create the exact same fractals and I would have no way of keeping the originals as my own. Plus, fractals can be rendered at any size so my images could start being used for purposes I did not approve. No one wants to go down that road. Overall, it's a security thing and I hope that most would respect that.
The purpose of this article and all articles on this subject is to be helpful and possibly provide some information that you can use to make new fractals of your own. It's all about exploration and experimentation. Without further ado, let's get on with it.
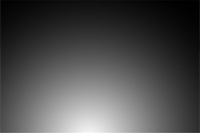
Layer 1
Layer 2
Layer 3
Layer 4
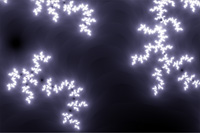
Layer 5
Layer 6

Layer 7
Layer 8

Layer 9

Layer 10
Layer 11
Layer 12
Layer 13
Layer 14
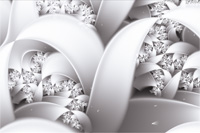
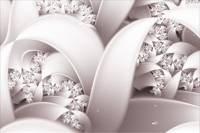
Final result
On the right is each layer of Confidence rendered individually listed in the order they are arranged in the final result as shown in the final render.
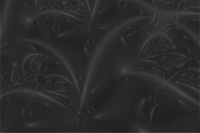
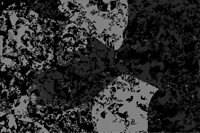
Layer 1
The main formula on which most other layers are based in this image is Carr-685 which can be found in Bob_Carr.frm. The Bob_Carr.frm file is available in the OrgForm Compilation. This set contains over eight thousand Fractint formulas. It's a bit daunting to sift through but there is plenty in there with which to work.
There are no adjustable parameters for the formula and I don't normally edit the source code behind them so the next step is to find an outside coloring algorithm (OCA) that produces some appealing shapes. One that I've used many times is the SemicubicalPrabola1 Trap which can be found in the jam.ucl file. This, and others in that file provide a wide variety of possibilities to play with when experimenting. I find it a great one to use when starting a new fractal. A simple greyscale gradient with a very slight hint of a pastel purple gives us our first layer.
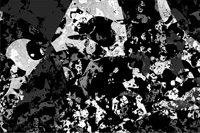
Layers 2 and 3
These layers go hand-in-hand becuase the second layer is a mask for the third. For those unclear on masking, when layer two masks layer three, it only allows layer three to show through where layer two is white or any shade of white. Layer three is identical to layer one except the purple in the gradient is now changed to a dark pink. With the merge mode set to normal, this produces a very faint rosy glow eminating from the bottom middle of the image. As more layers are added, this glow will be enhanced and provide the richer rosy color as shown in the final image.
Layer 4
This layer gives Confidence a lot of its color and brightness. Distance Estimator, a standard formula found in standard.ucl is used to provide the lightness in small detailed areas. Normally, these areas would show millions of little points as the main pattern is repeated into infinity. I wasn't too keen on that for this image so I wanted to cover them up but leave other areas unaffected and this formula allows me to do just that by setting the merge mode to Screen. Using Distance Estimator like this can be a bit tricky because it may start to look washed out or too dark depending on what colors you're working with. There's a delicate balance there and it takes a bit of fine-tuning to get it just right.
Layer 5
Here is where the image starts to take on a little more depth and we see our first bit of texture. While the colors are simple black and white, the merge mode Overlay enhances all layers underneath it. Colors become lighter or darker depending on their original state and all colors are richer. SemicubicalParabola1 Trap is used again with some adjusted parameter settings to create the fun shapes with highlights.
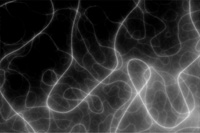
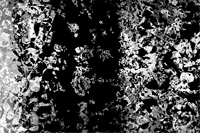
Layers 6, 7, and 8
All of these layers are very similar because their OCAs are the same (SemicubicalParabola1 Trap again) and their gradients contain only black and white. The difference comes from the parameter settings of each. The Z Initialization and Trap Transmute parameters were the only ones adjusted for each. The opacity was lowered to 24%, 15%, and 8% respectively with each merge mode set to Overlay. Great textures are created from these that are the thin stripes, dark curves, and small faint highlights.
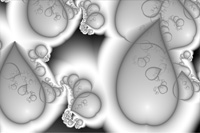
Layers 9 and 10
With merge mode set to Multiply, these bright layers add the splash of color to all of the "leaves." Both have the same primarily white gradient with blue and pink being the only colors present. The same OCA is used for these as the previous layers.
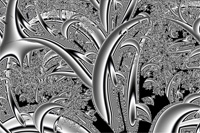
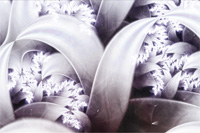
Layers 11, 12, 13, and 14
I love these layers and the textures that they create when combined. I've used them in several fractals and they never fail to amaze me. The method of making them into textures and the gradients is the same as previous layers but the shapes are another matter.
The base formula is not the same Carr-685 that I've been using all along. Layer eleven uses the basic Mandelbrot formula found in Standard.ufm—the same one you normally see when you open Ultra Fractal—while the other three use Newton Mset 1 found in mt.ufm. The OCA is the regular Smooth(Mandelbrot) in Standard.ucl but the others use Snowing in mtz.ucl. The fantastic shapes come from the mapping formula that is applied: Perlin Noise 3D found in dmj.uxf. With just the right settings, these fantastic tentacle-like and splotchy shapes emerge and can be used for textures in all sorts of ways. Some examples of where I used them are Possibilities, Collaborate, Winds of Autumn, Equilibrium, and EQ which is a different take on Equilibrium.
I was thrilled when I discovered the right settings for these shapes. When several instances of layer eleven are overlayed on top of each other, a great soft curly look can be created like that at the top of Collaborate. The other three create fantastic textures when the opacity is set very low like in Winds of Autumn. In Confidence, these layers all add just enough to the image to break up the smoothness and give life to the image.
As you can see in the final result, all the texture layers ended up enhancing the faint colors from the first few. That near-invisible rosy glow is now a warm dark rose and the shadows everywhere are much more apparent which give it a greater depth.
Hopefully this analysis gives you some ideas for new fractals of your own and answers some of those "How'd you do that?" questions. I'm sure it raises more as well but I'll do my best to answer them in future articles if you ask me.